
Just as nice as it is to try something different for dinner, I sometimes like to try something new for dessert too. It’s not as though I’ve ever heard anyone talk of being in a dessert rut (as if!), but I think overall, we tend to follow our routines across the board. Now, I know the preferred tastes of those in my circle and so when I stumble across something different, I pretty much file that into the, “I’ll make it for a potluck” category. A few weeks ago, that’s what I did with this recipe. It sounded good to me, but I knew no one else in the family would care for it, and Lord knows, I don’t need a dessert in the house that no one else will touch but me. So I did what any other self respecting/ restraining person would do: bake it, sample it, sample it again because it was that good, and then cut into pieces, place on a plate, cover and take to work the following day where it was eaten up.
I really enjoyed these, and since my family isn’t so adventurous to step outside their food comfort zone, I’ll make them again for another potluck.
Ingredients:
- 1 cup unsalted butter, room temperature
- 2/3 cup brown sugar, packed
- 1/2 tsp. salt
- 1 tsp. vanilla extract
- 1/4 tsp. ground cloves
- 1/4 tsp. allspice
- 1/4 tsp. nutmeg
- 1/2 tsp. ground ginger
- 2 cups all-purpose flour
- 3 pears
- 1 tbsp. cornstarch
Preparation:
Preheat oven to 350 degrees. Cream the butter and sugar together until light and fluffy. Beat in the salt, vanilla, and spices. Gradually add in the flour and mix until just combined. It will be crumbly.
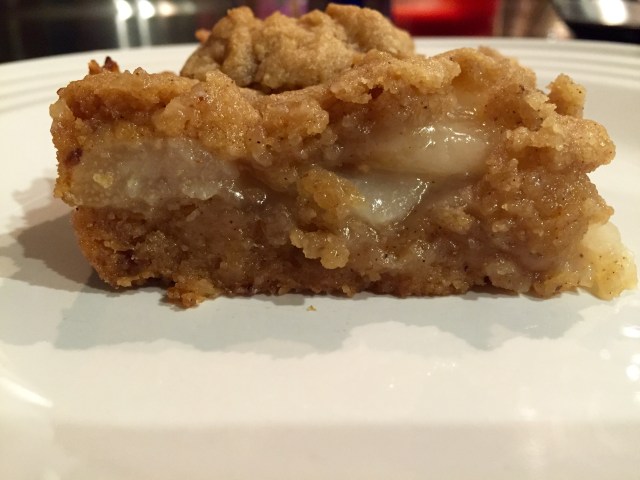
Take about 2/3 of the dough and press into the bottom of a 9×9 pan using your hands to pat down. Peel and slice the pears. Slice them thin if they are crisp; thicker if softer. Toss the pears with the cornstarch and lemon juice until well coated. Place the pears on top of the pressed dough and top with the remaining dough, sprinkling evenly among the top.
Bake for 35-40 minutes, until the top is lightly browned and you can hear the fruit bubbling.
Source: http://theviewfromgreatisland.com/pear-crumble-bars/
Note: After viewing the recipe and looking at the picture, I knew I would want more of the crumble so I doubled that part of the recipe. I hadn’t previously baked pears before, and while I used 4 pears, I didn’t know just how much they would bake down. I was happy with the doubled crumble mixture, but when I make it again, I’ll use 3 or 4 more pears for a better ratio. I also cut into it, served myself, and photographed a piece while it was still warm. It was quite delicious!


